


Ever wondered how to configure a simple yet secure authentication method in ASP.NET Core? Read on!
This article aims to give you a minimum set of steps necessary to configure certificate-based authentication in ASP.NET Core.
At the end of the article, I'll give you a list of more detailed resources, including a link to my test GitHub repo.
Who is certificate authentication for?
Here are a few typical scenarios that will benefit from certificate-based authentication:
- Authenticating users in a corporate (intranet) environment
- Communication between applications or APIs
- Identifying IoT devices for server resources access
Configuration steps
Here are the 3 steps:
- Configure the server (IIS)
- Create and install a self-signed certificate
- Set up the ASP.NET Core app for certificate authentication
Step #1: Configuring IIS
The actual validation and verification of a client certificate take place inside of IIS. We therefore need to configure IIS correctly to recognize and accept certificates.
Open the IIS Manager. Find the web application which you want to configure. In the Features View open SSL Settings.

Inside of the SSL Settings, check the checkbox next to "Require SSL" and select the "Client certificates: Require" option.
This will instruct IIS to accept (and require) client certificates and verify them before allowing the request to be passed over to our ASP.NET Core application.
Note: My test setup uses IIS as the host for the website. If you're using Kestrel to host your app, please, refer to the Kestrel configuration code in my example repo, or check out the official Microsoft documentation.
Step #2: Installing a client certificate
Next, we need to prepare the client certificates. The easiest option would be using certificates issued by a browser-trusted CA (GoDaddy, Comodo, etc.). In the case of an intranet application however, we can just safely go with self-signed certificates.
We'll accomplish the self-signed certificate installation in 2 steps. In the first step, we'll issue a new self-signed client certificate. The second step will then make the certificate trusted on the webserver.
Here is a PowerShell script to generate a new self-signed client certificate (valid for two years) and store it in the user's personal certificates store:
New-SelfSignedCertificate -certstorelocation cert:\CurrentUser\my `
    -Subject "Test User" -FriendlyName "Test client certificate" `
    -NotAfter (Get-Date).AddYears(2) -KeyUsageProperty Sign `
    -KeyUsage CertSign, CRLSign, DigitalSignature
In the User Certificates control panel you can now observe that a new certificate has been created inside of the Personal certificates store:

From here you can export the public key of the client certificate into a .cer file.
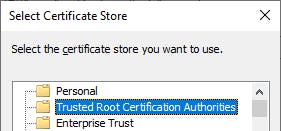
On the webserver, where IIS is installed, you have to install the certificate stored in the CER file, placing it into the Computer Certificates' Trusted roots store.
Great! We have prepared the client certificate, making it ready to be used on both client and server sides.
Step #3: ASP.NET Core authentication setup
Lastly, we are going to set up certificate authentication in our ASP.NET Core application.
The support for certificate authentication resides in a separate NuGet package. Therefore, let's first add the Microsoft.AspNetCore.Authentication.Certificate package to our app.
Now that we have support for certificates added, the only step remaining is correctly configuring our authentication pipeline. We do that by including the following code in our Startup.ConfigureServices method:
services
    .AddAuthentication(CertificateAuthenticationDefaults.AuthenticationScheme)
    .AddCertificate(options =>
    {
        options.AllowedCertificateTypes = CertificateTypes.All;
    });
There are several options that allow fine-tuning the behavior of the certificate authentication handler. In our case, we only changed the AllowedCertificateTypes option, to accept both chained and self-signed certificates (by default, only chained certificates are accepted).
Note that the Microsoft.AspNetCore.Authentication.Certificate package has been introduced in ASP.NET Core v3.0. If you're using a version of ASP.NET Core older than 3.0, you have to resort to a compatibility package created by Barry Dorrans named idunno.Authentication.Certificate.
Also, don't forget to actually add the authentication middleware to your ASP.NET Core request processing pipeline. Do this inside of the Startup.Configure method implementation:
app.UseAuthentication();
Seeing it in action
When the Web API is called from a browser (e.g. Chrome), you are asked to provide a client certificate:
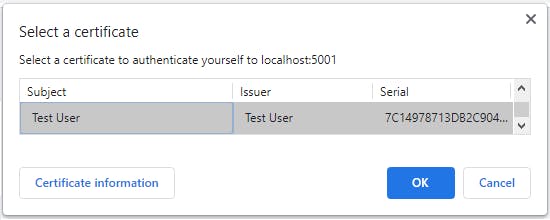
The webserver will then validate the certificate and if OK, the request will be sent to your ASP.NET Core Web API. The example response will look something like this:
Test API call successful! Certificate Subject Name: Test User
If on the other hand you do not specify a certificate, or you select an invalid/untrusted certificate, you'll receive an error response:
HTTP Error 403
or
ERR_BAD_SSL_CLIENT_AUTH_CERT
Check out the full sample in my GitHub repo:
Other resources
Microsoft Docs article describing Certificate Authentication:
Configure certificate authentication in ASP.NET Core
A neat article explaining the general benefits of using certificate-based authentication:
What Is Certificate-Based Authentication and Why Should I Use It?
Conclusion
Use these 3 easy steps and you'll secure access to your ASP.NET Core controllers by letting only the clients holding the client certificate invoke the controller functionality.
Pro Tip: For an even more secure setup, you can play with the various options available to the AddCertificate() call, for example implementing custom validation based on a certificate property.
Do you find authentication using client certificates useful? Let me know in the comments. Also, if you enjoyed this article, please, share it with your friends and colleagues!